
Fudge Brownies:
Mix the following ingredients together:
1 1/2 Cups Melted Butter
3 Cups Sugar
1/2 Cup Cocoa
Add: 6 Eggs, one at a time
Then add:
2 1/4 Cups Flour
1/2 Teaspoon Salt
1 1/2 Teaspoons Vanilla
You could also add chopped nuts to the brownie mix if you want! Mix it all together. Pour the batter onto the sheet cake pan and Bake at 350 for 25-30 minutes.

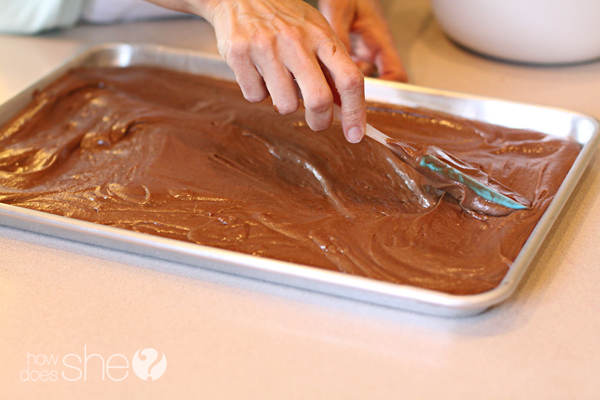
Grease your sheet cake pan and pour the brownie batter into the center.
 Spread it around to all the corners of the pan with a spatula, till it is even. Then pop it in the oven for 25-30 minutes. The time may vary depending on how hot your oven cooks, just keep an eye on them .
The spatula, you say? Don’t mind if I do!
 It should come out looking something like this. It should be solid, I know those delicious fall apart brownies are so amazing, but for this recipe to work you need a little bit of a firm surface to frost
  On to the mint frosting (aka: my favorite part!)
Mint Frosting Recipe:
3 Tablespoons Butter
3 Tablespoons Milk
2 3/4 Cups Powdered Sugar
3-4 drops of green food coloring (to desired color)
2-3 drops peppermint oil OR 1/4 – 1 teaspoon McCormick Pure Peppermint Extract (varies depending on how strong you want the flavor)
You can use a hand mixer or a fork whichever you prefer. Mix the ingredients together. You want the frosting to be fairly thick, if it is too thin add more powdered sugar. If it is too thick add a tiny bit of milk at a time and stir. Once you have reached the right consistency of frosting you will add the mint flavoring and food coloring.
You can really make the mint frosting any color you like! Pink would make for great Valentines day or Mothers Day brownies (hint, hint)!

Dollop that gorgeous mint frosting on to the center of the brownies. Begin spreading it to the edges using a spatula.
 Don’t spread it over the edges completely, we will want to hide this mint frosting with the next layer!
 It should be thin, translucent in some areas. Once the whole sheet is frosted, leave it for 5-6 minutes to set up. You can start making the chocolate frosting while you are waiting.
 You can test the frosting to see if it is dry by tapping on the frosting ridges.
 If it flattens the ridges without sticking to your fingers you are ready to move on.
 Chocolate Frosting Recipe:
6 Tablespoon Cocoa
4 1/2 Cups Powder Sugar
6 Tablespoons Soft Butter
3 Tablespoons Milk
1 Teaspoon vanilla
Mix the cocoa and powdered sugar together in a bowl, then add the milk, butter and vanilla and mix until smooth with a fork or hand mixer.
You also want this frosting to be thick. It needs to hold its shape when it is spread! So make sure it is looking something like this picture below!
 You will want to leave about a 1/4 cup of the frosting in the bowl, that will not be used. Dollop 5 scoops of the chocolate frosting onto the mint, make the center dollop the biggest. This will make it easier to spread across the sheet.
 Using a flat metal spatula begin spreading the frosting. Start in the center and spread it to each of the other dollops. Connect the dots and work it to the edges. Be careful and make sure it isn’t lifting the mint frosting below.
 Cover all the mint on the edges so it is a hidden surprise!
 Once it is spread evenly over the surface you are ready for the next step.
 Start in one corner. Using the metal spatula carefully go back and forth across the frosting to create a ridged pattern. Tilt the spatula up towards the edge of the pan that you are moving towards, then glide across the frosting. You don’t want to lift the spatula when you finish a line, keep it smooth and go back and forth.
 When you finish gently lift the spatula and try not to make the frosting peak.
 Use a knife, going perpendicular to the lines you just created, and glide over the ridges. Don’t cut very deep, not even through to the mint, just the surface.
 Keep the lines about the same distance apart as you move down the pan.
These are the brownies that I made for Grandma Audrey's funeral.
ReplyDeleteI love these! Thanks for posting!
ReplyDelete